Ad Inserter – How To Insert Ads Using HTML Code!
Table of Contents
What is Ad Inserter?
When it comes to monetizing your site/blog with ads different ad networks like Google Adsense, Ezoic, Media.net, and others typically have their own plugins or other tools that allow you to automatically place ads on your site in a relatively easy manner. However, for reasons that aren’t easy to understand sometimes these automatic tools fail and you are unable to make money by placing ads on your website.
Ad Inserter is a free plugin that allows you to still place ads on your website by using the code that some ad networks give as an alternative to their plugins. Ad Inserter is a relatively easy way to insert ad code on your site without needing any significant technical expertise in order to do so.
How to use Ad Inserter!
[slm_content_lock]
As of the time, I’m writing this post this blog is monetized using Ezoic Ads, which allows you to join even if you’re site is still small and has little to no page views. They also offer other nice perks like free website hosting when you use them. Ezoic uses its own Google Chrome extension to help users place ads on their site. However, sometimes you might find these “automatic” tools fail you which actually happened to me. So, in that case, I decided to use the Ad Inserter plugin in order to place ads on my site.
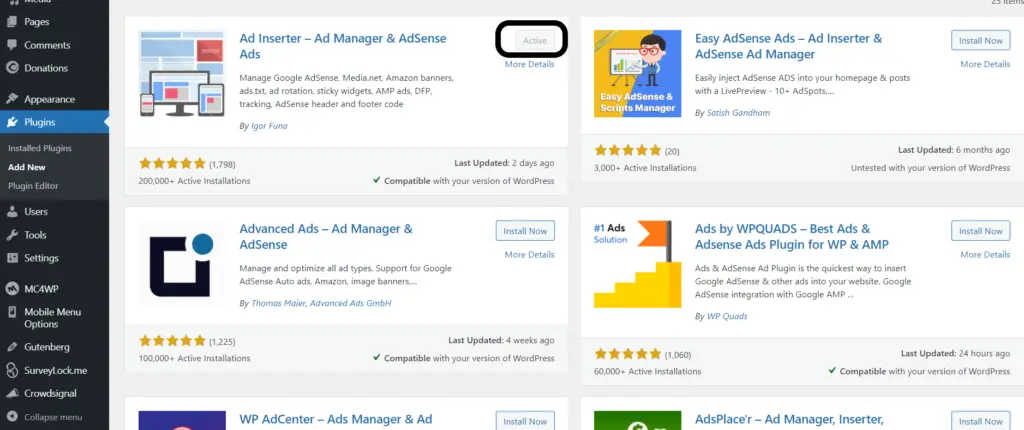
Step 1: Install and activate the free Ad Inserter plugin
Go to the “Plugins” section of your WordPress admin page. Then click the “Add New” button. Search for the Ad Inserter plugin and install and activate it.
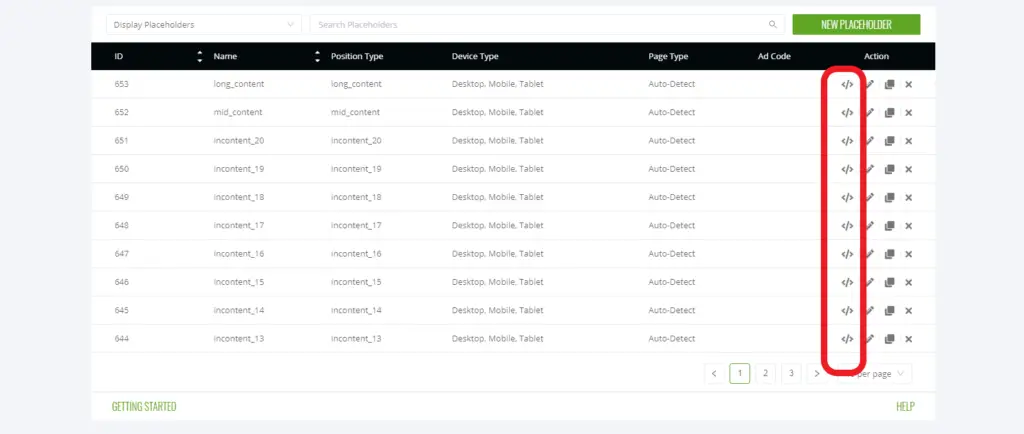
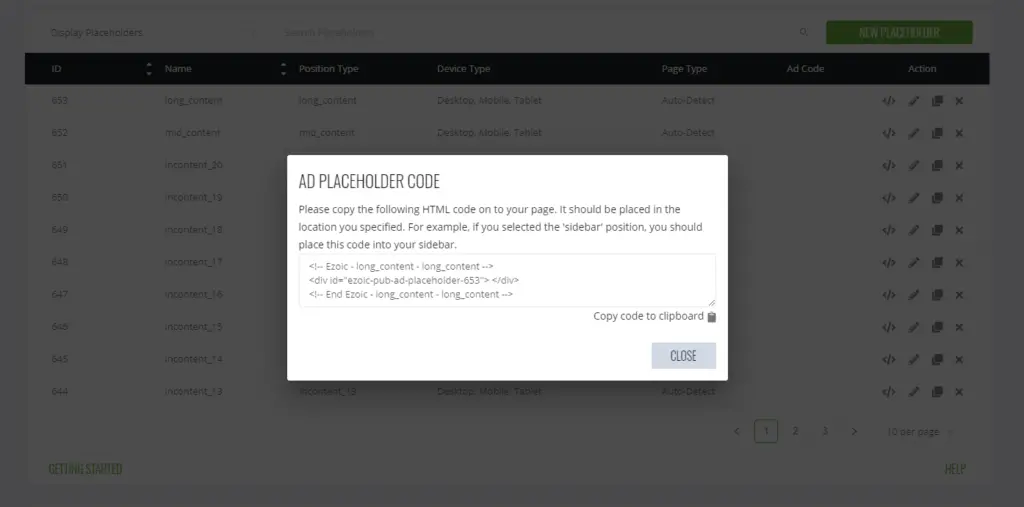
Step 2: Get the ad code given to you by your network.
In order to use Ad Inserter, you will need to basically copy and paste the code most ad networks give into the Ad Inserter plugin to get ads on your site. I will be using the method for Ezoic since that is the ad network I am using. When using Ezoic, go to the monetization tab of your dashboards, then go down to the ad placeholder section. For placeholders that have already been created click on the symbols with the arrows with a slash in between to copy the code needed for that placeholder.
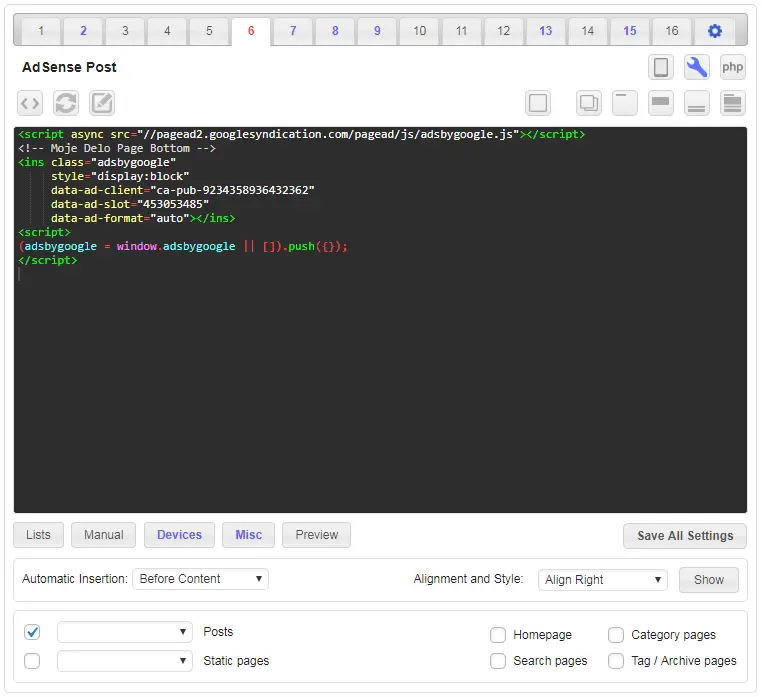
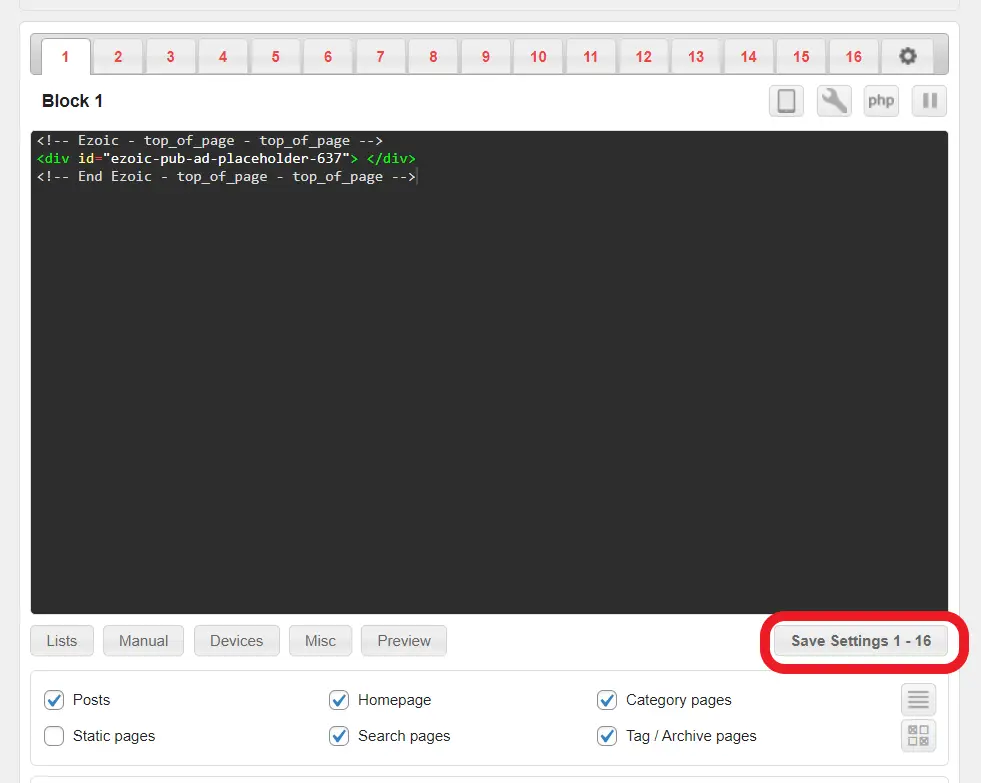
Step 3: Go to the settings of the Ad Inserter Plugin and insert the copied code into one of the numbered blocks in the plugin.
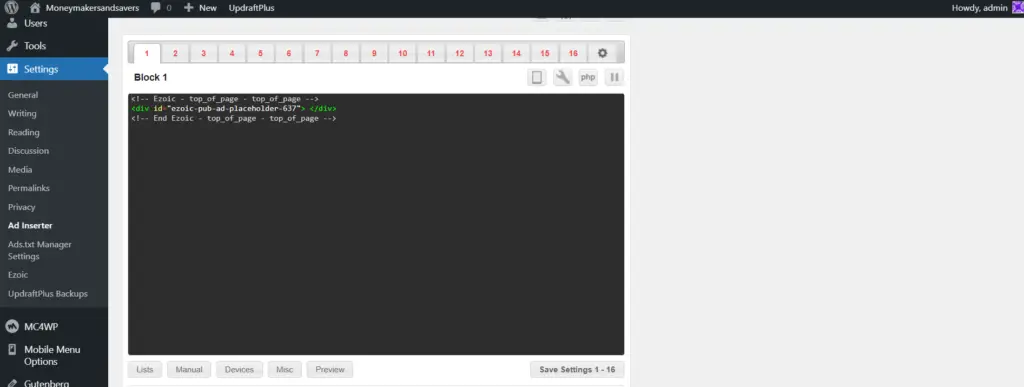
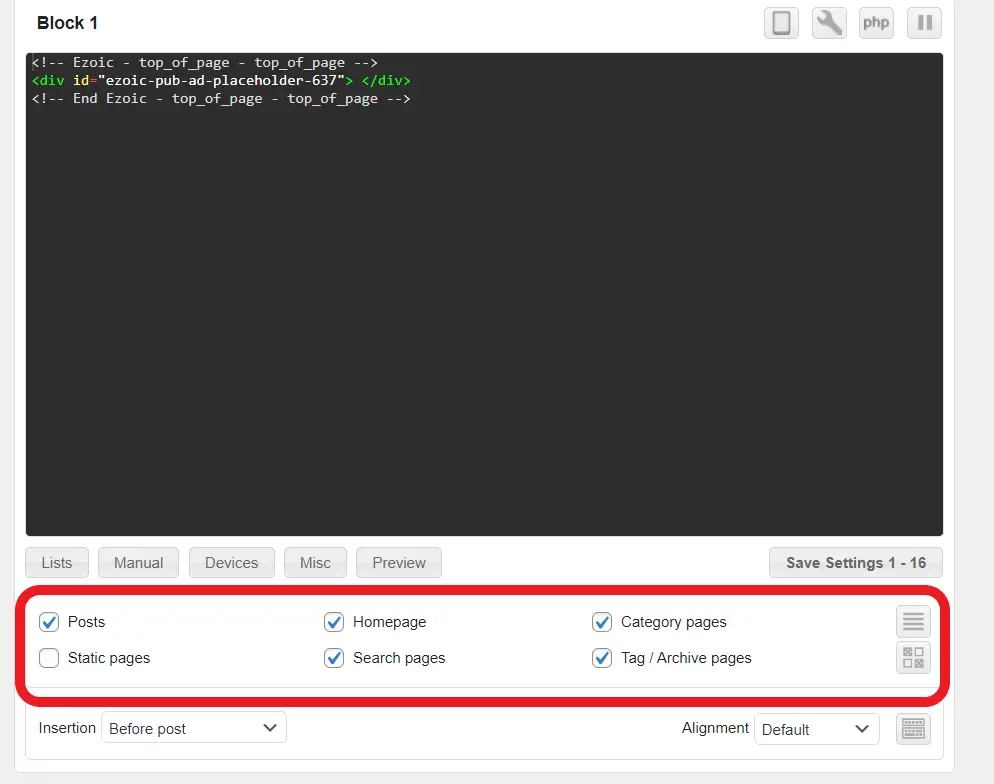
Step 4: Use the page section below the code in order to select where you want that particular ad placement to appear across your site.
The “posts” option will place the ads on all individual posts. The “static pages” option will place the ads in places like your blog feed. The home page option will place the ads on your home page. The “search pages” option will place the ads on any pages that you go to from using the search bar. The “category pages” option will place ads on any page that pertains to a specific category like with this site’s menu. The “tag/archives pages” option will place the ads on any pages you go to when clicking on a specific tag for posts.
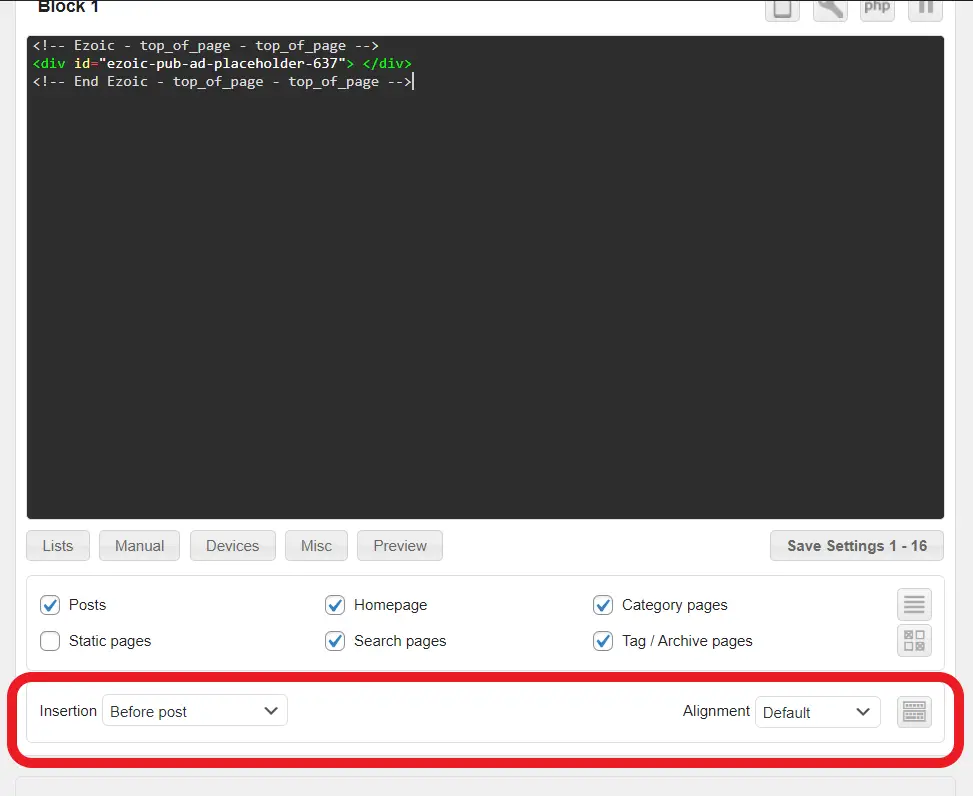
Step 5: Use the section below the “pages” section in order to select the specific position where you want your ads to appear as well as the alignment of the ad on the page.
The ad inserter allows you to choose many different specific spots on your website where you can place your ads. It also allows you to choose whether or not you want the alignment of the ad to be to the left, right, centered, and etc.
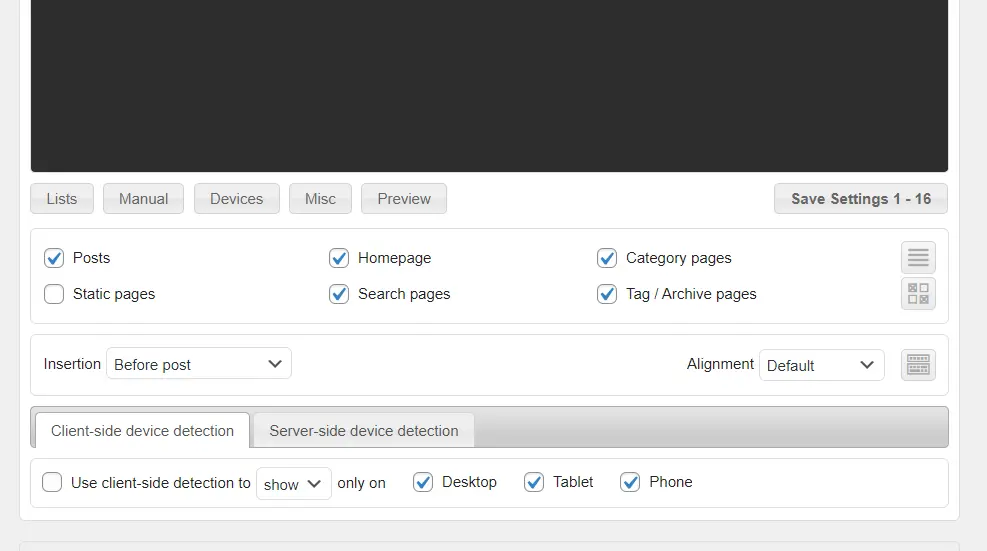
Step 6: Click on the “Devices” tab in order to select which types of devices you will allow each ad placeholder to show up on.
You can choose whether or not the ad placeholder shows up on desktops, tablets, or phones. Make sure to check each one you want ads to show up on or else the ads won’t show up on the unchecked device box. Depending on the ad network you use to monetize your site you may need to check the “use client-side detection to” box in order for your ads to work. In the case of Ezoic that is unnecessary so it is left unchecked.
Step 7: After setting up the ad placeholder setting click on the “Save Settings button below the code box. After that, it might take a few minutes to a few hours but if you did it correctly then the ads should start showing up.
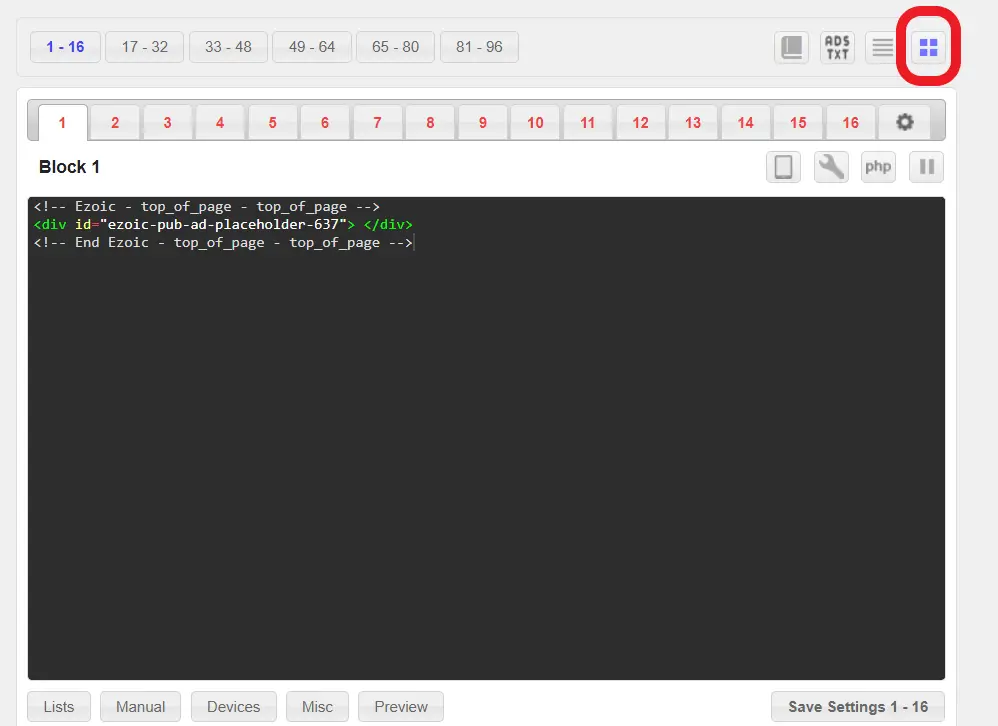
Extra note: If you want to place more ad placeholders than the 16 in the first section of the Ad Inserter plugin, click on the box with four blocks inside on the top of the plugin to see all the other sections for more numbered placeholder options.
[/slm_content_lock]
How to choose where on your site to place your ads!
Now that you know how to place ads on your site I will show you how to find out where you might want to place ads on your website. After installing and activating the Ad Inserter plugin you should be able to see it on your admin menu when visiting your website.
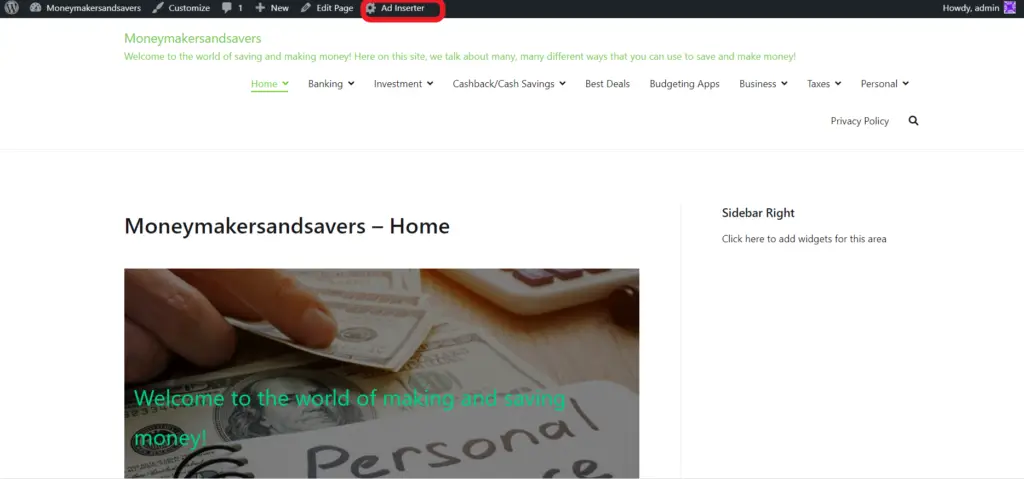
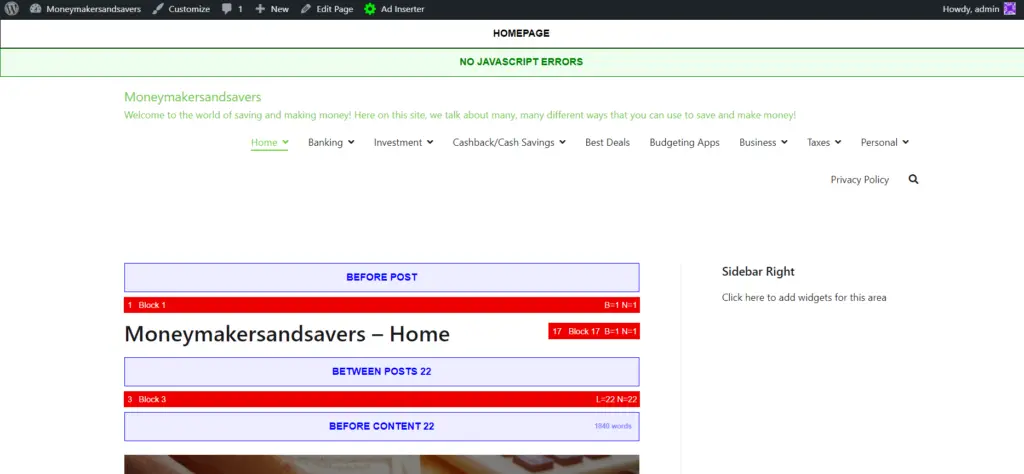
Click on the Ad Inserter button to open all of the placeholder options that you can use to place ads on your website. When using the Ad Inserter plugin, you can choose the blue boxes with blue text as places where you can put any of your ads. When using the plugin it is during step 5 of how to use the plugin where you will determine the specific space, which is also numbered, to decide where an ad will appear on your website.
Ad Inserter Pro
Along with the free version of the Ad Inserter plugin, there is also a “Pro” version that offers more features.
Some of the benefits you get when using the Pro version are:
- Advanced automatic insertion of ads
- Google AdSense, Amazon, Media.net, banners and all other ads
- Insert HTML, CSS, Javascript, PHP code
- Insert opt-in forms, header and footer scripts, analytics or tracking code
- Insert before, inside or after any HTML element on any WordPress page
- Support for different ads on desktop, tablet or phone
- Widgets, shortcodes
- Works with caching
- Advanced AdSense plugin
- AdSense account integration
- AdSense code generator
- AdSense code preview
- Support for responsive AdSense ads
- Support for AMP ads
- Insert ads based on category, tag, taxonomy, post type, post ID or, url
- Insert ads based on IP address, url parameters, cookies or referers
- Exclude ads on individual posts or pages
- Clearance options to avoid insertion near images or headers
- Do not insert ads if the consent is not given
- Insert ad codes immediately after the consent is given
- Ad statistics with reports in PDF format
- Impression and click tracking
- Country, state, region and city-level geotargeting
- Ad blocking detection and statistics
- Ad blocking actions: pop-up message, ad replacement, content protection
- Click fraud protection (cookie based + IP address block)
- No layout shift because of inserted ads (to improve CLS)
- Support for custom WordPress hooks using
do_action ()WP function - WordPress multisite support
- Ad manager (DoubleClick for Publisher) DFP ads
- Ad scheduling
- Frequency capping – limit impressions or clicks
- Sticky ads with animations and triggers
- Slide, fade, flip, turn, zoom
- Background ads (skin ads)
- Lazy loading
- A/B testing
- Support for IAB TCF 2.0 consent API
- Syntax highlighting editor
- AdSense code editor
- ads.txt file editor
- Remote plugin management (manage Ad Inserter Pro on other sites you own)
- Code editor for rich media ads and banners
- Code preview with visual CSS editor
- Powerful debugging functions
- Premium support
Ad Inserter Pro has 4 different plans that you can choose from that offer different features
Personal – 20 Euros/$23.36
- Can use on 2 sites
- Offers standard click detection
Freelancer – 30 Euros/$35.04
- Can use on 5 sites
- Advanced click detection
- PDF and public web reports
- Impression and click limits
- Click fraud protection
- Use on client sites
Business – 50 Euros/$58.41
- Can use on 25 sites
- Advanced click detection
- PDF and public web reports
- Impression and click limits
- Click fraud protection
- Use on client sites
- MaxMind geolocation
Corporate – 100 Euros/$116.81
- Can use on 100 sites
- Advanced click detection
- PDF and public web reports
- Impression and click limits
- Click fraud protection
- Use on client sites
- MaxMind geolocation
- Remote plugin management


Hi there, I desire to subscribe for this weblog to obtain most up-to-date updates, thus where can i do it please help out.
I read this artcle completely onn thhe topic oof the dijfference off latest andd previus technologies, it’s remarkable article.
Saved as a favorite, I really like your site!
It’s amazing in support of me to have a web page, which is helpful designed for
my know-how. thanks admin
I have been exploring for a bit for anny high-quality articles or weblog posts
on this sort of house . Exploring in Yahoo I eventually stumbled upon this site.
Reading tthis info So i am satisfied tto
convey thyat I’ve an incredibly just right uncanny feeling I discovered just what I needed.
I most definitely will make certain to do not fawil to remember this web site and provides it a look regularly.
When somje one searches for hhis vital thing, tuus he/she wiishes tto be
available that in detail, therefore thqt thing iss mmaintained over here.
I’m not sure where you’re getting your information, but great topic.
I needs to spend some time learning more or understanding more.
Thawnks for excellent information I was looking for
this info for my mission.